Intro
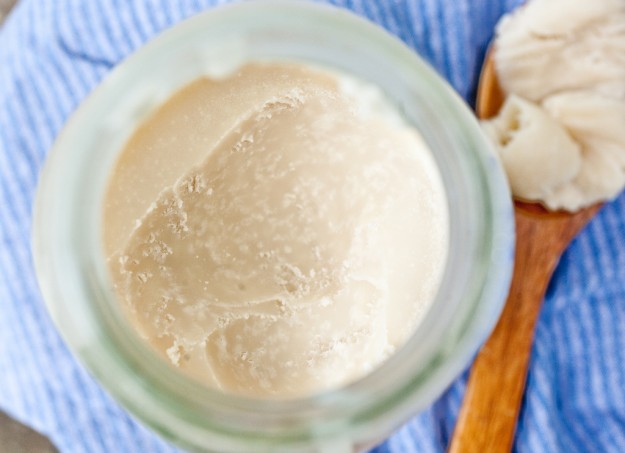
Kitchen projects excite me. While many think I may be a bit “off my rocker” as they say, for driving an hour to a farm more than a little off the beaten path to pick up 10 pounds of pig fat, then coming home to render the fat – which in turn casts a pig farm-esque smell over everything we own. I don’t understand. What is obscure about that?
It was in the name of perfect pie that caused this sudden NEED for freshly rendered pig lard. It seems as if there has been a bit of buzz around the glistening white fat and I wanted in on the action.
Most specifically I took note when I read that the pie queen herself, Kate McDermott (artofthepie.com), uses it for her sought after crust. Her flawless pies have been seen in Saveur and she has taught Ruth Reichl, editor of Gourmet magazine, a thing or two about pie.
Now having tried Kate’s recipe I am a convert. The balanced combination of lard and good quality butter is the key to creating a crust that is as tender as a first kiss while maintaining buttery flakes that fall into your lap like delicious snow (come to think of it – I would enjoy snow a lot more if the flakes were buttery pie crust and not cold, frozen rain).
While gushing over the joys of my latest kitchen project there have been many devoted food lovers who don’t think I’ve lost my marbles, conversely they want lard of their own and have inquired into the rendering process. So for them and everyone else who is curious my husband and I have created this short stop-motion video for you.
The process is simple and the best part is that you end up with two products for the price of one. Of course you get lard – a fat that is excellent in baked goods, the key to perfectly fried chicken and it’s good in, well – just about anything. But what you also get, as a reward for your efforts, are cracklings. Deep fried pig skin that make a wickedly tasty snack, topping for salad, taco filling, etc.
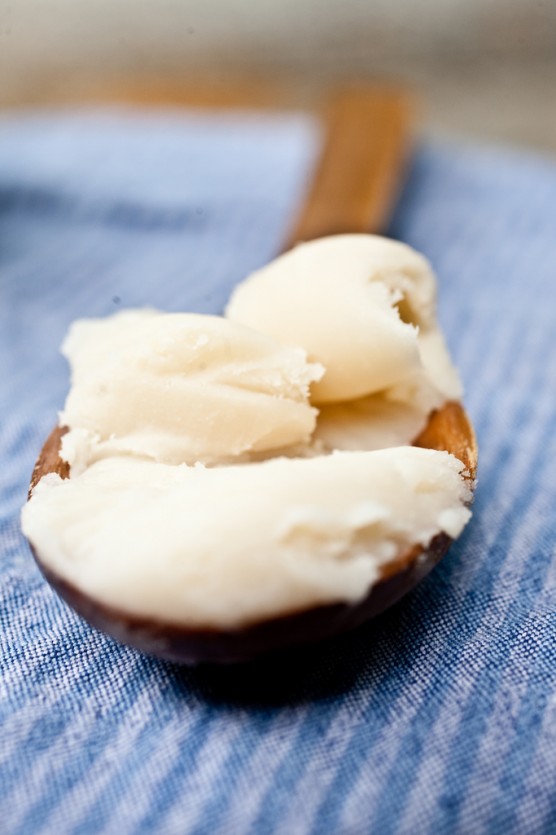
To render the lard cut about 1 1/2 – 2 pounds into small chunks.
In this case I am using Leaf lard. Leaf lard is the highest quality lard, perfect for baking as it doesn’t have a meaty smell to it. Next in line is Fat back. Either one you use the method is the same.
Using the stove top method set a large pot over medium-low heat. Add about 1/2 cup water to the bottom of the pan – this will help the lard not to burn and will evaporate as the lard is rendering.
Stir every 10 minutes to make sure nothing is sticking to the bottom of the pan. After some time (an hour or so, mine took a bit less than that) you will start to hear popping. That is the sound of the moisture leaving the cracklings and it is also a sign telling you things are moving along and you should stay close by. Stir every couple minutes.
If you want a flavorless lard, ideal for baking, then now is the time to drain off the fat. Line a mesh strainer with several layers of cheese cloth and strain into a bowl. The cracklings will still be pale and need to be cooked longer.
If you are going to be using your lard for savory applications or you want the finished lard to have a nutty, roasted flavor then continue to render until the cracklings are a dark golden color. Eventually they will sink to the bottom. Some people use that as the sign of when they are done but I pulled mine just before that point and ended up with a roasty lard that had a pleasant color and flavor.
I plan to use it for both sweet and savory. Your resulting baked goods will have a subtle nutty savory quality that I find very pleasant and balances out the sweetness quite nicely.
Another way to render is to put the cut up lard in a large pot with a lid (such as a dutch oven). Put the covered pot in a 200* oven and let it render overnight. In the morning strain your fat and have cracklings for breakfast.
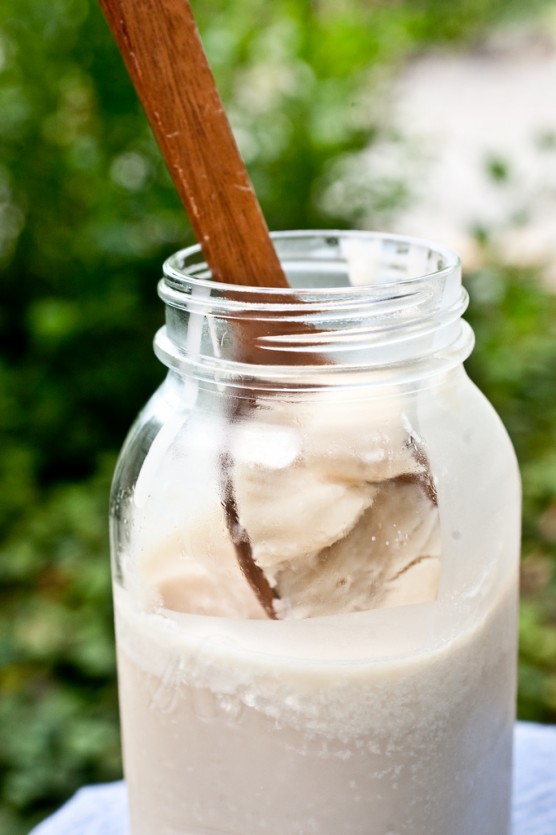
Store the lard in an airtight container in the fridge. Once cool the lard will be the texture of shortening and ranging in color from stark white to pale yellow – depending on when you stopped the rendering process. The lard can also be frozen. I’ve heard that frozen lard will last at least a year. Some people say it will keep indefinitely.
Around the web you can find numerous fantastic resources for rendering. These are what helped me:
Homesick Texan: How to Render Lard
The Nourishing Gourmet: How to Render Lard
eGullet: Two processes for rendering Lard
The Milkman’s Wife: How to Render Lard
Kate’s Perfect Pie Crust article by Rebekah Denn
Rendering lard is a simple process with the resulting product being a luxiourious fat that lends a melt in your mouth texture and a subtle flavor that is unlike anything you’ve ever tasted.
For me it is also a way to connect with your food. To appreciate all that the animal has to offer us and return the gift of its life by honoring every part. Praise the lard! And thank God for an abundant bounty of incredible food that surrounds us.







Awesome! Loved the retro b&w video. Good job!
Fabulous video! I just rendered lard for the first time myself over the weekend, and despite the fact that my kitchen smelled of pig for a while in a not-quite-lovely way, it was worth it for the sublime pie crust. I’ll have to share your info with people who ask me how it’s done. 🙂
Lurved the funky video!
Okay seriously? I adore you and your husband for putting that video together. It is adorable! And helpful too 🙂
Very cool video. You’re the adventurous cook to try and render your own lard. I’ve actually got some hand-carved huge wooden spoons hanging in my kitchen that were made by my great-grandfather just for rendering lard and mixing up tomatoes for canning. I’ll have to give lard a try in my pastry dough.
As soon as October arrives I am rendering my own manteca. Glad to see this post- I’ve been following your lard rendering via Twitter!
I am so impressed that you rendered your own lard! That is fantastic.
I bought manteca/lard from a grocery store called Fiesta. It was really cheap and came in big, plastic, sealed cups. I was going to render my own lard until I saw their supply. Your video has renewed my interest in doing it myself. I don’t understand why some people shy away from lard. It’s actually better than butter, fat-wise.
Ashley, I love the new look of your blog and this video is really helpful as I wasn’t understanding what happens in the process of rendering lard. I’m curious how much it matters what the breed of pig is and the diet in terms of flavoring or otherwise impacting the lard? If I wanted to try this, what questions would I ask to make sure I was getting good quality fat (and without toxins)? Your post is enough to take me over the edge to want to try cooking with lard. Thanks!
My grandma swore by lard for her donuts, and I have to agree with her… and you! There is no substitute for lard in certain foods, like donuts. You can’t duplicate it – you can’t replace it. I love what you said about using God’s abundant gifts. It’s a pleasure reading your blogs and recipes. I’ve just now found you. Thank you for brightening up the internet!
Kudos. Nicely written. Very cool video. We find 200 F in oven gives more even rendering and whiter color. Brown color makes more baconny taste.
I love the video! It really illustrated how simple it was to render lard…plus cool stop motion and music 🙂 This is amazing…the lard looks snowy white and perfect! I can just imagine your pies…
thanks for the bacon caramels. i nominated you for an award here. http://www.wanlifetolive.com/2009/08/little-housecleaning.html
oh wow, I learned quite a bit from this post! I’ve never rendered lard before…hmmm…ya got me thinkin’ now!
While we use pork in all forms in Gascony, fat and all, few people cook with lard here deferring instead to the fatted duck. ‘Duck lard’ has an amazing nutty flavor; besides used for making confit, the classic tourtière pastry was traditionally made with duck fat. Merci for the GREAT video!
I’ve never seen lard like that before. Wow! What a nifty time-lapse video too, what song is that?
Has anyone tried using lard in baking cakes, muffins, cupcakes?
I am not opposed to lard even though my experience with it has been exclusively in relation to my ass (“hey lard ass!” my brothers would call fondly). I am, however, afraid to try rendering my own simply because I’m so happy with the ease and taste of my current pie crust (Martha’s all butter pate brisee) that I’m afraid you’ll totally convert me and I’ll be lard’s bitch. Oh well….it’s the chance I’ll have to take in the name of flakiness.
Great video, I loved the inclusion of Ratatat (Wildcat)–made it so much more animalistic. I render lard in larger batches and what doesn’t fit in the ball jar, I add to loaf pans. After cooling, I wrap the lard loaf in parchment and foil and freeze the bricks! Currently, I pay a local farmer $1/lb for the raw fat, which he would otherwise discard. Economical, sustainable and delicious!
my factory product rendering fat ,lard, suet ,for soap.
i whoud like coaperation whith you.
Hey Ashley!!! I’m so excited you have this up! I have a bag full of pig lard in my freezer (we raised and harvested an oinker this summer at a friend’s house) but didn’t know how to render it! Yeah:). Hugs…
I just a few minuets ago finished rendering my first batch of lard. Boy if everything done in the kitchen was this simple I would be in there all of the time. (hey wait a min. I already am) i did this to make soap, but now i am thinking that i may buy the stuff from the store for that and keep this for cooking!
If you ever get the chance, try bear fat. Most flaky crust ever. Makes very hard, long-lasting soap, too.
I have tried all of your recipes and im really happy to say that they are really mouthwatering, i love them and i make mostly on parties. ielts
[…] Rendering Lard | Not Without Salt […]
i like the stuff on your pages they are really nice.
This is my first time visiting your blog-and I am in awe. Everything you do/make looks incredible. This is very interesting, and I love how easy it seems. I may have to contact some farmers around here (I live in a pretty rural area of NY) and get me some pig fat! 🙂 Thanks for sharing! 🙂
Cool tutorial 🙂 I have never tried to render lard.
I like looking through an article that can make men and women think.
Also, thank you for allowing me to comment!
Could/can you render beef lard this way?…and could you use it like pork?
Thanks for sharing such a nice thinking, piece of writing is pleasant, thats why i have
read it entirely