

Intro
Thank you so much for your kind words from the last post. Sharing all of that left me with a bit of a vulnerability hangover but I was so lifted by your comments and reminded of how fortunate I am for this community and that I get the pleasure of sharing my life with you all. I appreciate each and everyone of you who responded with such grace and vulnerability. Now let’s go talk about candy!
About three years ago I started teaching a homemade candy bar class at The Pantry. It’s the sort of class that makes me giddy to get to do the work I do because basically in that moment I’m Willy Wonka. Perhaps a slightly less eccentric version than the characters in both versions of the movie, but maybe not.
My students have to work very hard in the three hours we have together. They whip up batches of peanut butter laced nougat, turn ordinary sugar into copper colored caramel dotted with vanilla bean flecks and beat powdered sugar into peppermint scented dough. All of that work culminates in a chocolate dipping party that spans the length of the 20-foot table. Six bowls line the middle, each filled with either melted milk chocolate or bittersweet. At the end of it all we have dozens of homemade Snickers, Peppermint Patties, Butterfingers, Peanut Butter Cups, Twix Bars and fifteen very happy people. Each one of them walk into that room skeptical of their abilities to turn simple ingredients into childhood favorites and by the end of the night they walk away with a box filled with candies better than the originals.
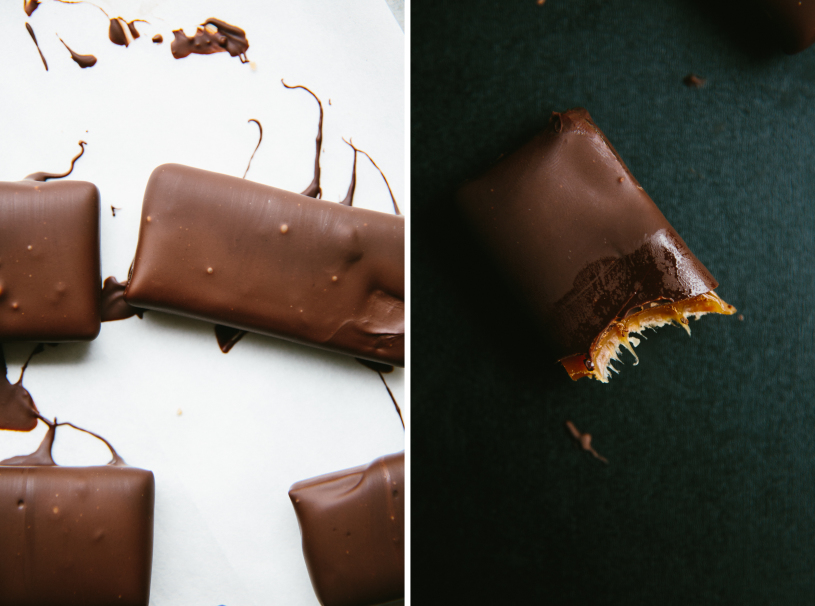
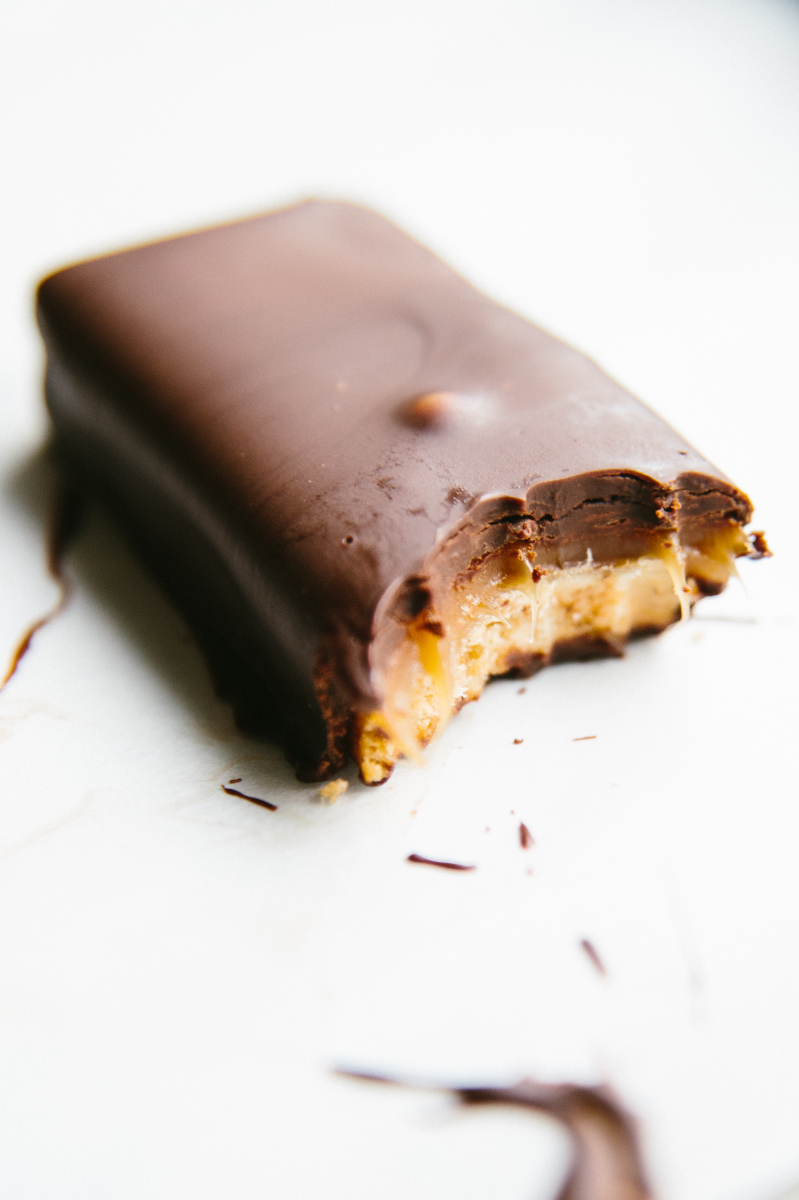
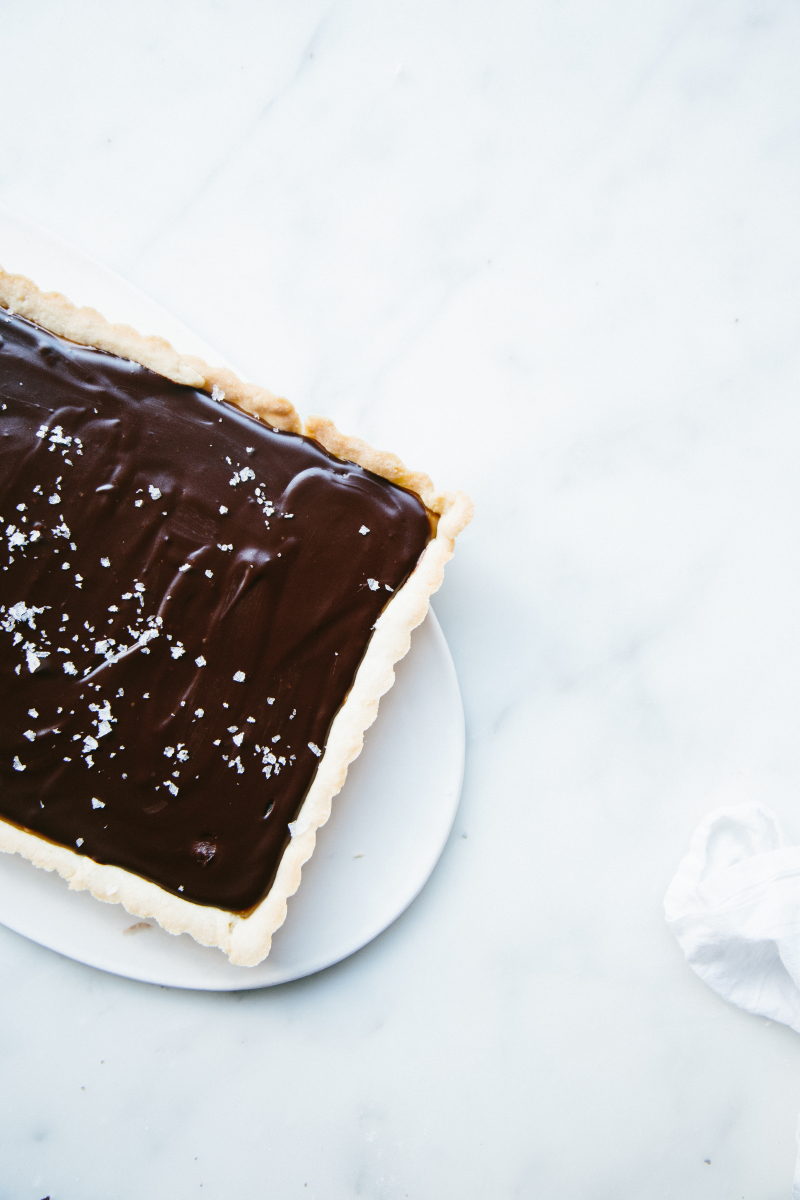
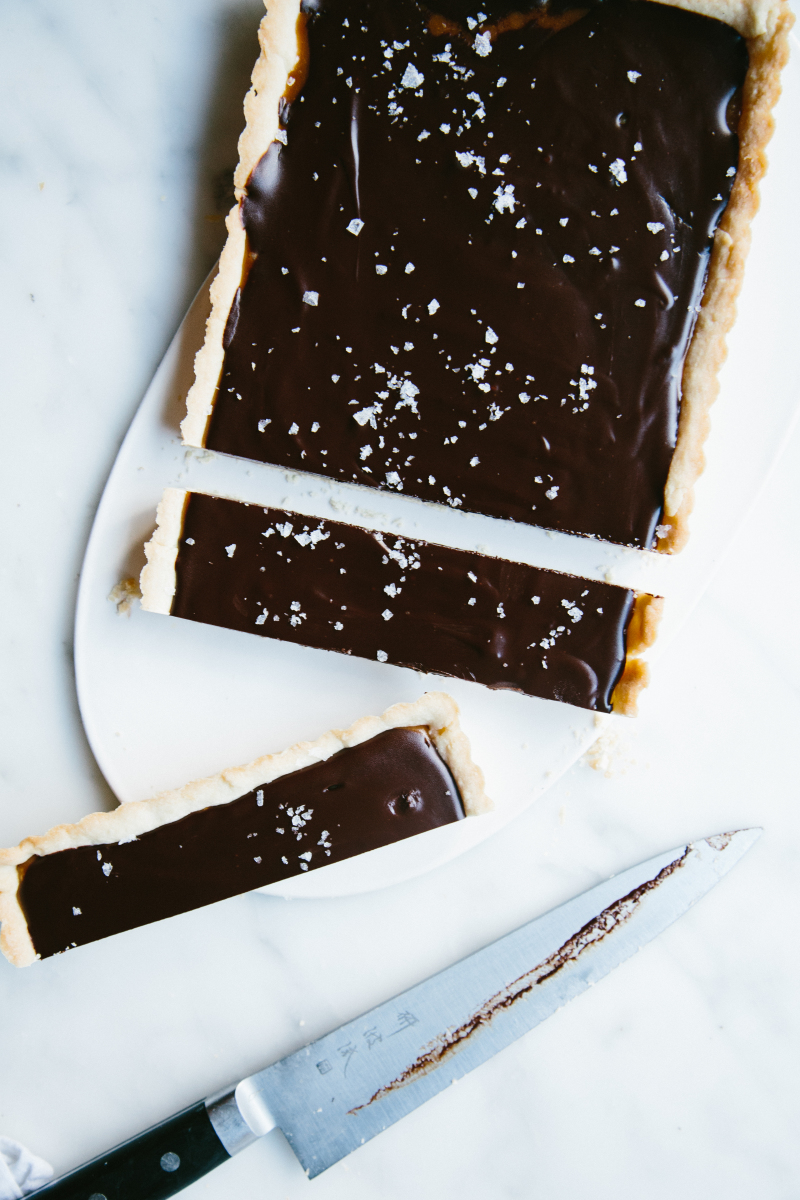
There are a few candy recipes on this site and one of them is for homemade Twix but in the process of teaching this class I have perfected my recipe and have only recently realized that I’ve not been back to share the new and improved version. Even better still, I went and turned the recipe into a tart so you can just go ahead and skip all the time and mess of dipping the individual bars in chocolate.
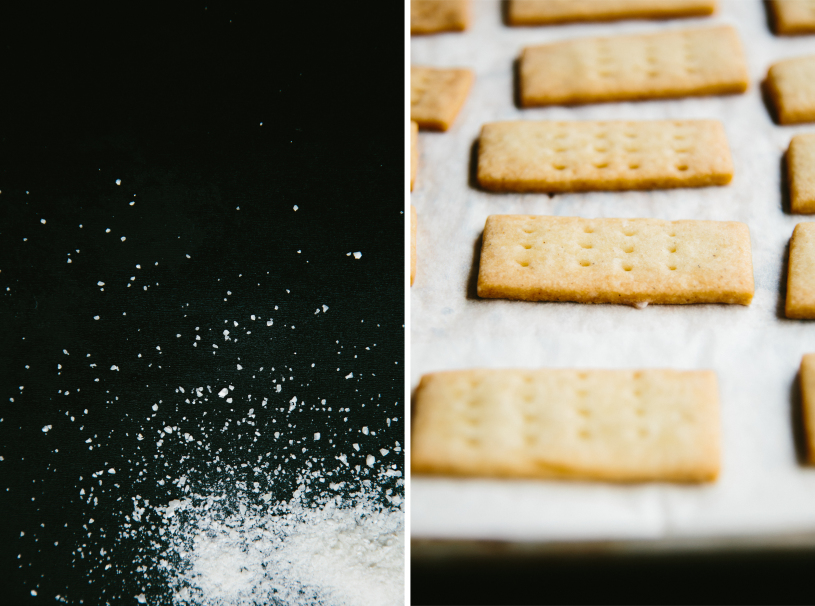
If you do want the candy bars it’s a bit of a process but not a hard one. The buttery cookie base includes a touch of finely ground rice. A strange ingredient indeed but it’s a trick I learned from my former Pastry Chef, Sherry Yard, while working at Spago, and I trust that lady with all things butter and sugar. Plain white rice is blitzed in a spice grinder (or blender) – which, by the way, is a perfect way to clean your spice grinder, and then a couple of tablespoons is added to the dough. It adds a pleasant crunch that I just love. The bases are cut and baked then pressed gently into the still warm caramel. Once set you cut along the edge of the cookie so that you have a perfectly formed cookie and caramel layer ready to dip into chocolate. Or, like I said, skip all of that and just make the tart.
Our October newsletter is going to hit your inbox next week and it’s all about candy including a bonus recipe that is always a huge hit in class. Sign up (or leave your email in a comment and I’ll be sure you’re on the list).


Just when I am trying to wean off sugar you throw this in my face!!! It looks fantastic! Of course, as I tell my kid, if you’re going to eat crap, eat homemade crap.
I will put this off as long as possible, but that might be a question of hours, not days.
Love making candy, I have made it for holidays for years but excited about learning some new kinds. You didn’t mention what size tart pan, I notice yours seem to be rectangular but I have 3 sizes. I like to make tarts. looking foward to candy post.
love that you have them in bar and tart form! and the ground rice sounds very unusual, but toasty!
Oh wow! This looks delicious. May just have to add it to our Canadian thanksgiving Dinner this Sunday!
Awesome! Happy Thanksgiving!
Just want to be sure I’m on the list, pretty sure I am. Recipes look delicious, but would love to take a class! Happy creating
Leah
This recipe looks marvelous. Thanks for your vulnerability and I am sure you spoke to a lot of people who struggle. I think most people have at one time or another–me included. I would love to get your newsletter.
YUMMMY
Loved the candy making class you taught at the Pantry. No longer fearful of tempering chocolate!?
Yay!! That’s huge.
If I subscribed, will the newsletter come to my inbox? Please sign me up!
Yes. Once a month newsletter. Thanks!
These look delicious! I would love to be on the list to get the newsletter! Thank you so much!
I’m not a huge fan of Twix bars, but after seeing these photos of your homemade version, I will gladly give it another shot!
This looks SO MUCH better than the store-bought twix! I can’t wait to give it a try!
Every single one of your blog post is amazing. I am not much of a dessert guy but this bar has my mouth watering.
I’m going to have to make this over the holiday.
I’m totally one of those weird people that isn’t crazy about chocolate, but these just look ridiculously good!
Everyone is welcome here – even the non-chocolate lovers. 🙂
There are so many newsletters. I want yours:)
That’s so kind. Thank you. I’ll be sure you get added.
What are the dimensions of the tart pan you used?
My pan was 7×11 but really any would work – you may have some leftover dough.
you have the recipe for a tart but you also have bars pictured. how are the bars made? I prefer the bars .
My tart pan was 7×11. You can use a 9 or 10-inch round.
Mary – the instructions for the bars are written just above the tart recipe. Same ingredients just a different method.
oh man, I’ll take a box of those peppermint patties please. Hugh and I are talking about doing whole 30 just to get us back on track and all i can think about are ssswweeeettsss. But rice! How brilliant.
These will be waiting for you when the 30 is over.
Oh nooo, of course I missed the famed Peppermint Patty newsletter! Is it too late for me to get the October one?
Hi there! Just realized that I signed up for the newsletter a few months ago? Weeks ago? But have not actually received it. Would you be able to re-send? Thank you so much!
So sorry! Yes, I’ll have it sent to you.
Hello! I’ve made the tart recipe with great success a few times now, so delicious! I just started making the individual bars and found my short bread burned when cooked for the full 15 minutes and were ready at just 10 minutes. I noticed the bars say to cook at 375 while the tart cooks at 350, is that difference intentional?