Intro
I started making homemade pasta when I was eight. My parents kindly complimenting my bowls of mush while eating soppy noodles with much oohing and ahhing. I’ve since improved my pasta making skills.
The moment I realized I could make my own butter I was out of my seat and shaking a jar of cream. As time allows I make my own puff pastry, soft cheeses, mayonnaise, marshmallows, dressings, etc. And even though our garden is quite meager, I get giddy when I am able to feed my family from the tiny seeds I planted just weeks prior.
As we are so often surrounded by pre-made products I am incredibly satisfied when I am able to fulfill a need using raw materials readily found in my kitchen. Most often it is things like pulling warm homemade bread out of the oven or sewing an airy summer dress for my daughter that calls upon these emotions and connects me to the generations prior for which this was their normal.
For some reason it is those classic childhood flavors in the form of sugary candy that I rarely think to recreate at home. I find such mystery in their creation, quite possibly because I don’t recognize a single ingredient found on the back of their colorful exterior. I, in a more-frequent-than-should-be moment, enjoy the familiarity of their flavor and move on never stopping for a moment to think, I could make this. In fact it could quite possibly even be better.
Their cloyingly sweet flavors could be made less harsh through the use of less refined ingredients. The familiar waxy melt of their chocolate that contains little to none of the ingredients found in those football shaped cacao pods could be replaced with bittersweet chocolate that puddles and melts against the heat of the tongue.
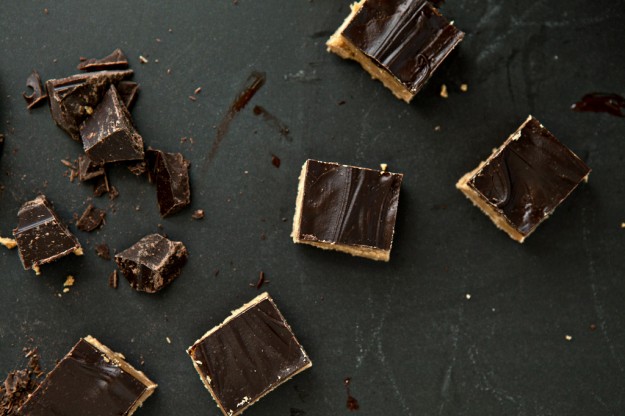
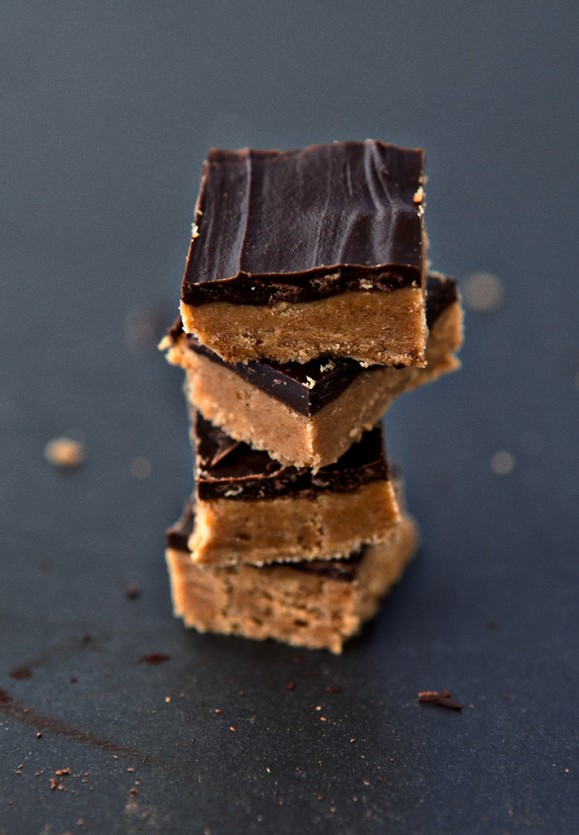
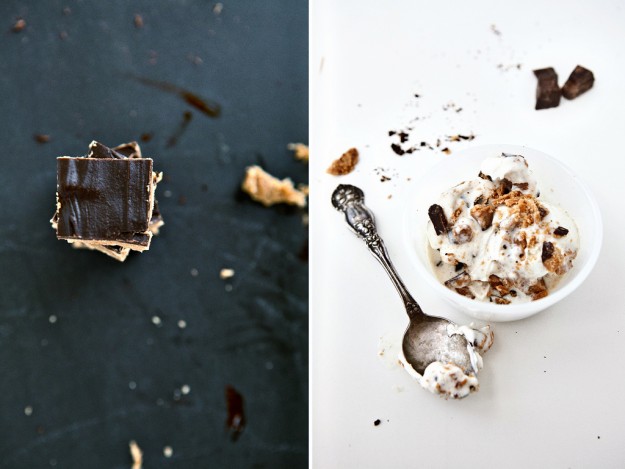
Such a revelation occurred when I happened upon a recipe for homemade peanut butter finger candy. As a child I adored the odd orange candy that shattered under the weight of my young, eager bite. Strangely enough I don’t think I realized that peanut butter was the main ingredient for this candy until recently. In my young mind it was just something crunchy, sweet, and there was chocolate – no further thinking needed. Even more alluring was the memory of these candies crushed into bits and stirred into creamy vanilla flavored soft serve. Yes, that’s right – a Butterfinger blizzard. So cold it makes your head hurt but so satisfying that you don’t care.
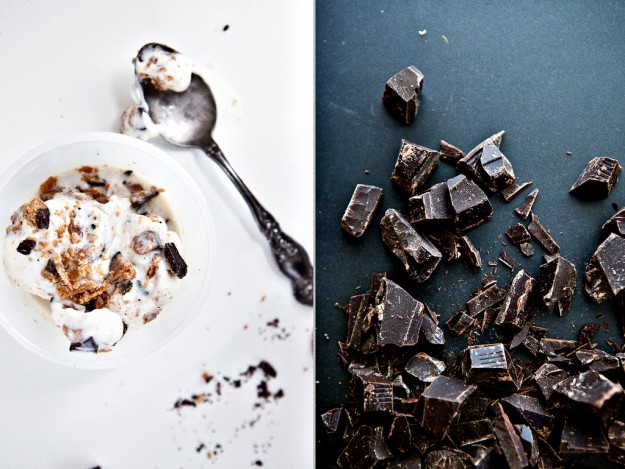
The trick in recreating flavors you’ve enjoyed all throughout your life is getting them to satisfy you in the same way they did in your memory. You want them to be better than the store-bought version but not so much so that they no longer resemble what you were originally trying to create. It’s a fine balance and I am thrilled to report that this recipe has achieved such convenient-store-candy-recreating success. And you must, for the love of a Blizzard, stir these sugary crumbs into ice cream.
Continue for the recipe..


Oh that is absolute heaven, Ashley! I loved your twix bars when I made them, and somehow made it out alive, so I’ll have to try these!
So frickin brilliant. I’m suddenly craving butterfinger, but something tells me this will be SO much better than the packaged stuff. Thanks for sharing with us!
What? No peanut butter in peanut butterfinger bars? Like you, I didn’t question either…just crunched away. In Missouri (hubby’s state), there is this treat called a frozen custard. It is sort of like a blizzard but, dare I say, richer. My favorite is to add chopped up butterfinger pieces to it. I can’t even imagine a custard with your homemade butterfingers chopped into it. Delicious!
This may be the most dangerous recipe I’ve ever seen.
I love making things that most people buy. We always have a jar of fresh mayonnaise and one of homemade blue cheese dressing (I have a 6 year old addict) in the fridge. People think it’s so strange, but the homemade version tastes so much better. The only fear I have is that if I made these, my kids would demand them weekly! Wait, who are we kidding–I’D want to make them weekly! 🙂
This looks ridiculously easy. Can’t wait to try it.
These have been on my list for months, so happy you figured them out! They look perfect!
Your butterfinger bars look fantastic. It’s got me reminiscing about my fav childhood candy- Reese’s peanut butter cups. Do those next please! 😉
Ashley,
any advice on candy thermometers? I have gotten a few that are cheapies that don’t seem worth it.
thanks!
Lesli
@Lesli – Such a great question. I updated the post with that info. Thanks for asking that.
My goodness these look amazing. I have always strayed away from making candy at home- the temperatures and my propensity for burning sugar have made me fearful of the task. But this definitely demystifies one of my favorite childhood candies!
I’m not sure if I’ll take the time to try this one, but it’s really nice to know that it’s possible to make junk food at home that’s not as junky as the store-bought stuff. I like sugary foods as much as anyone, but I try to stay away from high fructose/hydrogenated, non-food garbage.
I cannot wait to make these!! They look so good!
Like you, I don’t often buy pre-made things. I love knowing what goes into the meals we eat.
of all places, jo-ann fabrics has a big ‘last minute’ section of candy and i had a moment of weakness this afternoon standing in line and bought one. has been in my top three favorites candies since as long as i can remember! this homemade version sounds fabulous.
I’m nervous about candymaking… but these look too good. I invested in a candy thermometer after seeing your homemade Twix recipe, but haven’t gotten up the courage to make them yet. I think this recipe might be the turning point! Wish me luck 🙂
@Christine – It can be scary but the reward is so worth it. Please let me know if I can help. I’m happy to hold your hand through this process. 🙂
I’ve been interested in getting more into candy making… now I have every reason to! They look d i v i n e.
Love this! I adore Butterfinger candy. Thanks for the recipe!
Butterfinger was always one of my favorites but I’m realizing that I haven’t eaten it in years in an effort to avoid processed things. But my husband and I were talking about our last meals the other night and among the list of things (the very long list) I requested, I included a Butterfinger. I will absolutely be making this. And very soon.
@Alejandra – How funny. I think you will be so very pleased.
Over the top! Can I request Nutter Butters? That would be an amazing DYI treat!
@Michelle – For you, I shall try. Someday.
Homemade is the way to go… whether it’s butter, cheese… or your favorite candy bar. And boy does this look magnificent!
This may be the death of me! Oh how I loved these candy bars…might be too tempting to try, as I’m sure I’d eat the entire pan! But then again, I may have to have a cooking time with Ty and see if he inherited my taste buds. 🙂
Second only to the Cadbury Creme Eggs, this is my favorite candy, in your recipe index as well as in the store. Not that I buy them now so much, oh no! But the memory…looking forward to this one!
Oh my, those look amazing. I looooove butterfingers 😀 I’m going to save this for a special occasion when I have to share with lots of people because those could be so dangerous in my house 😀
I came across your blog thru Martha Stewart’s blog. I love everything about your blog!!!! The graphic design, the title, the recipes!!! I am thrilled with the concept of making store-bought things at home. Looking forward to digging through your archives and to reading future posts!
@Grace in Full – Thanks so much. I really appreciate you reading and taking he time to comment. Welcome!
Do you prefer to use an all-natural peanut butter, or something like Skippy? Sometimes it makes a difference in cookies. Think it would work with almond or cashew butter, too?
@Amelia Great question. I tried both and they turned out beautifully. Just make sure that if is the natural kind that you mix in the oil that floats on top, very well. You could even use chunky peanut butter to add an intriguing texture.
Thanks for reading and thanks for the question.
Ashley
yum!! this looks absolutely wonderful. i have always loved butterfingers….but yours look better!!
@Mary – ohhhh thanks. 🙂
soo good i had to blog!
i suck at cooking and baking, but these look easy enough for me to do, hopefully:P
xx
@Justine – Thanks so much! Your blog is beeeeeautiful!
This looks completely delicious! xx
http://www.thelondoner.me/
Every time you post that your recipe was adapted from somewhere else, I want to click and buy the book! But I love it. Can’t wait to make these. I’ll have to make an equally delicious non peanut option for Grant as he’s allergic.
These look UNREAL. I’m a little scared with the temperature/burning idea… but these look worth the risk!
Oh that first photo is simply divine! It tells a story in its own little way 🙂 gorgeous recipe, im not very good at candy making but find it so fun! So hopefully will give this a go some day 🙂
Memories often come with a bite into something sweet. Recreating flavours makes childhood neverending.
I just made these and am excited to see how they turn out. Question: just before I hit 290*, it started to smell like the sugar was burning. I didn’t want to skimp on the almost-hard-crack, but where’s the tipping point?
Thanks!
@Jami – How did they turn out?! I don’t remember a burnt sugar smell. Have you tested the accuracy of your thermometer lately? Sometimes sugar on the sides of the pan can cook more than what’s in the pot, it’s possible that is what caused the burnt smell.
I can not wait to try this! I love that they are pressed in a pan so I don’t have to dip individual candies.
wow those look amazing I was looking at ”Love From the Oven” and she had put these up, THEY LOOK AMAZINGLY DELICIOUS
Just made these and they didn’t turn out…..when I went to put it in the pan they just got all crumbly. The bottom held together somewhat but the top half was so crumbly I couldn’t cut them let alone spread chocolate on them. I’ve made candy before and have a good thermometer….do you think the sugar got too hot or not hot enough, or something else?
Despite the crumbliness, I just kind of mixed the chocolate chips into the crumbles and will store in the freezer. Delicious, not share-worthy in terms of looks, but I have a huge store of butterfinger ice cream awaiting me!
@Sara – I’m so sorry it didn’t work out. That’s so frustrating – I can relate.
🙂 I actually had that happen the first time I made these. I tested
this recipe several delicious times. 🙂 The crumbling occured for me
when I didn’t mix the sugar and peanut butter fast enough or the
peanut butter wasn’t warm enough. The sugar will crystalize quickly so
you must move fast. Stir them together them immediately get it into
the pan. Does that make sense?
I hope that helps and I do hope you try again, it’ll be worth it. I’m
happy to answer any further questions.
Thanks for reading!
Ashley
I LOVE these, and I’ve made them a bunch of times now. Such a great recipe, thanks for sharing!
A question, though: how do you get yours to cut so evenly? Mine always have quite jagged edges. Are yours still a little warm? Am I waiting too long?
Thanks!
Featured you in our Food Trends article this week! Just love this recipe. http://is.gd/WKSTQg
These look AHMAZING! So glad to have found your blog! Long long do these keep out of the freezer? Would they melt? Am thinking of making them as xmas presents…noms!
@Nessie – Such a great Christmas present! I’d say they’d keep in the freezer at least 2 weeks. You’d probably be safe up to a month as well.
Happy Tasty Tuesday! We love this recipe and it is featured on our DIY & Homemade Halloween Candy Recipes! Thanks!
http://4virtu.com/2012/10/16-diy-homemade-halloween-candy-recipes/
I would leave out the corn syrup…no GMO’s for me!
I’ve been experimenting with various ratios trying to get that perfect butterfinger center and my recipe is identical to yours except for the vanilla. I’ll add this on my next batch.
Candy making is in my blood. My grandfather was a confectioner for his entire life and I’ve been making candy for decades. That said, you can indeed teach an old dog new tricks and I learned a great one a few days ago. Rather than worry about wiping away any sugar crystals that are stuck to the side of the pan all you need to so is put a lid on it for a moment when the mixture first begins to boil. The condensation gently dissolves the stray crystals and drips into the mixture eliminating the chance of ruining your batch by reseeding.
Oh Boy! Butterfingers are Anders’ Favorite…I’m gonna have to make these right away!
You nailed it! Butterfingers are one of my favorites. I ended up cutting the candy into squares and dipping them in semi-sweet chocolate. Yay! Thanks!
So glad you like them, Cindy!
what can i use as a substitute for the corn syrup?
Kathy,
I’ve had great success using Lyle’s golden syrup in many recipes instead of corn syrup. Although I have not tried it here so I’m not sure if it would give the same results.
That looks so delicious!!
https://www.rosaliegoes.co
These look AHMAZING! So glad to have found your blog!