pieces of heaven

Today I found myself pursuing the cold. I didn’t bundle up on our walk to the park after dinner. I did not turn up the heat when I got home. I removed my layers down to a t-shirt and procrastinated putting on my slippers just so that my chill could be cured from the warmth of a cup of hot cocoa topped with homemade marshmallows. I remained in a continuous slightly chilled state until I tucked my sweet boys in bed, so that my enjoyment of my warm treat would be uninterrupted.  From there I placed a saucepan on the stove, filled it with milk, brought it to a boil, turned off the heat and added several pieces of dark chocolate. I poured this luxurious concoction into a large mug then topped with two pillowy puffs of whipped vanilla bean studded heaven.


For moments like these I not only welcome the cold, I invite it in like a long lost friend because nothing is more satisfying to remove a chill then with a steaming mug of rich hot cocoa and sweet vanilla scented homemade marshmallows. Now if only I had a fireplace to curl up to.
If you have never met the deliciousness that is a homemade marshmallow I not only encourage you I URGE you to stop what you are doing and whip up a batch. The process is simple. Don’t let the cooking of sugar scare you off – just don’t burn yourself because that would definitely hinder your enjoyment of this intoxicating treat.


Marshmallows

Ingredients adapted from Alton Brown 3 packages unflavored gelatin 1 cups cold water, divided 12 ounces granulated sugar, approximately 1 1/2 cups 1 cup light corn syrup (or glucose) 1 teaspoon kosher salt 1 vanilla bean, seeds removed 1/4 cup confectioners' sugar 1/4 cup cornstarch Nonstick spray Method Place the gelatin into the bowl of a stand mixer along with 1/2 cup of the water. Have the whisk attachment standing by.In a small saucepan combine the remaining 1/2 cup water, granulated sugar, corn syrup and salt. Place over medium high heat, cover and allow to cook for 3 to 4 minutes. Uncover, clip a candy thermometer onto the side of the pan and continue to cook until the mixture reaches 240 degrees F, approximately 7 to 8 minutes. Once the mixture reaches this temperature, immediately remove from the heat. Turn the mixer on low speed and, while running, slowly pour the sugar syrup down the side of the bowl into the gelatin mixture. Once you have added all of the syrup, increase the speed to high. Add the vanilla seeds. Continue to whip until the mixture becomes very thick and is lukewarm, approximately 12 to 15 minutes.  While the mixture is whipping prepare the pans as follows.   Combine the confectioners' sugar and cornstarch in a small bowl. Line a 13 by 9-inch metal baking pan with aluminum then spray with pan spray. Add the sugar and cornstarch mixture and move around to completely coat the bottom and sides of the pan. Return the remaining mixture to the bowl for later use.When ready, pour the mixture into the prepared pan, using a lightly oiled spatula for spreading evenly into the pan. Dust the top with enough of the remaining sugar and cornstarch mixture to lightly cover. Reserve the rest for later. Allow the marshmallows to sit uncovered for at least 4 hours and up to overnight. Turn the marshmallows out onto a cutting board and cut into 1-inch squares using a pizza wheel or sharp knife dusted with the confectioners' sugar mixture. Once cut, lightly dust all sides of each marshmallow with the remaining mixture, using additional if necessary. Store in an airtight container for up to 3 weeks. (I suggest doubling the recipe - yes, they are that good.)  
  • 94 Comments /
  • Permalink

Learn how to make Puff Pastry in 20 seconds

[youtube D_J_Nqf6q2Y 550 435]

So if you are like me pictures really do speak a thousand words. When learning a new technique if I have an image to guide me along the process then I am golden.

Because of this I decided to post again on Puff pastry (yes, it is that good it deserves multiple posts) In the brief but educational video above you will see the steps necessary to laminate your puff dough. If that moved a little to quickly for you then hear is a visual step-by-step instruction perfect for all you right-brainers out there.

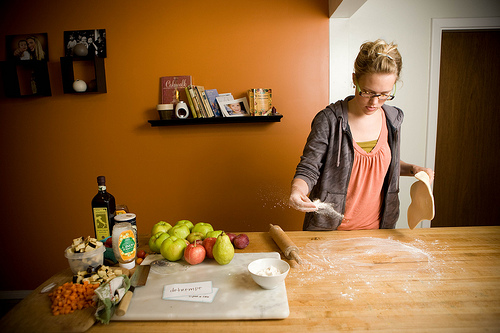
First we start with the detrempe (the dough) and the butter block (just a little bit of butter in this recipe – speaking of recipe… you can find it here.)

Then take the slightly cooler than room temperature detrempe and start shaping it into a plus sign, or a dissected envelope. I start shaping it with my hands and then I use the rolling pin.

The butter is soft enough to bend (if it is to cold it will crack) but not to soft that it gives when you touch it.

Place the butter in the center of the detrempe.

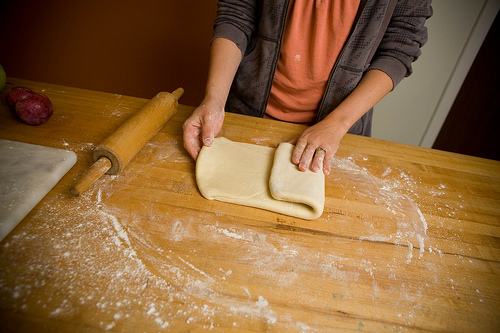
Tightly fold the detrempe around the butter block.

Take out some aggression by pounding the dough. This way the butter is dispersed throughout and then you can use the rolling pin to even it out.

Roll the dough into a rectangle then fold like a business letter.

Rotate 90* and do the process again. That was one turn. I do two turns then let it rest for one hour until I have a total of six turns.

If you look real closely you can see the layers of butter evenly throughout. I can not ever get over how beautiful this is. When I teach this course my students think I am partially crazy because of how excited I get about the butter in the dough. I proceed to pass it around class in hopes that my excitement will be contagious.

This lucky batch of puff pastry was transformed into meat pies (a mixture of ground beef, vegetables, spices and tomato paste then stuffed into a pastry package) and apple turnovers – which I reluctantly shared with my dad… it was his birthday after all.

I hope you enjoyed and I really hope this has provided even more assistance to remove the fear that is associated with creating puff pastry.

shoutout to Gabe and my brother-in-law Garrett for putting the 20 second stop-motion video together!!

Recipe for puff pastry can be found here.

  • 37 Comments /
  • Permalink