Shaky and Stirred
I jumped into the professional food scene feet first. Newly married and months away from graduating I was re-thinking the original plan. That June I graduated with a degree in Studio Arts and needed two quarters of student teaching to receive my Secondary Education Certification.
Maybe it was the fact that as soon as I was married my dad handed over the tuition bills to my new (now debt-ridden) husband. Or maybe it was just that I didn’t feel as passionate about teaching as I once had but that June I happily accepted my Art degree and said good-bye to teaching – for now. In lieu of the cap and gown and subjecting my loved ones to the torture of sitting in a over-crowded gymnasium waiting hours for my name to be called, we celebrated my graduation over a delicious meal.
While one dream was evolving another was emerging. Food was working its way into my life and I happily welcomed it with open arms and an insatiable appetite. Alone in my tiny apartment kitchen I performed countless experiments trying to create new recipes. I read numerous books about food, each one igniting a new project.
For awhile I had an under ground chocolate business running out of that kitchen. I meticulously candied slivers of orange peel to sit atop my Grand Mariner truffles. I made homemade peanut butter, infused it with cream then blended that mixture with dark chocolate. I topped it with a dried cherry and called the Peanut Butter and Jelly Truffle. I guess you can’t really call it a business as my husband and I ate most, if not all of our product – for research purposes of course.
After four years of liberal arts college I finally knew what I wanted to study – pastry. Going to culinary school was out of the question as I couldn’t possibly imagine tacking on any more school debt to the already massive bills. So I picked up the phone and made some calls.
I’ll save you all the details but basically I ended up working at a highly regarded bakery in Seattle under the tutillage of William Leaman. I quickly outgrew all three of the positions I managed to climb to in the six months I worked there and I was itching for a change. I met a former Sous Chef from Wolfgang Puck’s Spago in Beverly Hills, put together a killer resume – padded with beautiful images as my experience was quite limited and made another phone call. Next thing I knew I was on the phone with Sherry Yard (g Puck’s pastry chef). My husband and I packed up our fire-engine-red Oldsmobile Achieva and moved our life to Beverly Hills.
That brings us back to where I am now. Fast forward a few years, living back in the rain, two kids, 5 1/2 wonderful years of marriage and thousands of pounds of butter that has been melted, whipped, blended, and cut in to something sweet and delicious.
Having trained under those conditions were brutal. For months living in L.A. I would come home, throw myself onto our Murphy bed and flood my pillow with tears wondering what I have done but knowing that I would never give up – even though I wanted to so badly. But now I know pastry. Don’t get me wrong, I still have a LOT of learn but I know enough to teach it with confidence, field urgent questions from family and friends in the midst of a seemingly failed recipe and encourage you, my dear readers, to whip, beat and fold to your hearts content.
But now this blog is about more than just sugar – and however excited I am about that – as I LOVE all things savory – my confidence in this side of the kitchen is a bit more shaky. I am very much a home cook. I stood next to the hot line plating thousands of desserts and I watched in awe as they meticulously seared, broiled and roasted precious cuts of meat. But my cooking is confined to my own kitchen.
Ask me about meringue and I’ll gush for hours. Ask me about risotto, for example and I’ll hum and haw then ultimately differ you to the masters. Alas here I am, about to introduce you to Red Beet Risotto. I will do my best to explain the techniques that I have picked up from asking numerous questions of the incredible chefs that I have been so lucky to cross paths with.
In reality it was quite simple and I scoffed at the technique presented in the original recipe as it said to add all the liquid at once. Which from what I know about risotto is the number one commandment NOT to do.
The process of making risotto involves continuously stirring the rice mixture while gradually adding warm broth (Mark Bittman says, however that you don’t have to stir it as continuously as I had originally thought). You want the rice to soak up the cooking liquid before you start adding more. This process ensures a creamy final dish. The ultimate risotto is slightly al dente, definitely not mushy or soupy.
Each chef has their own interpretation on how to make “perfect” risotto – don’t let the frightening guidelines keep you from making it. I have made it several times and each time it has turned out deliciously. It may not be good enough to make the Italian grandmothers proud but it is happily devoured by my family and hungry dinner guests and has become a fantastic dish used to clean out our fridge as the possibilities of what can be added to risotto are endless.
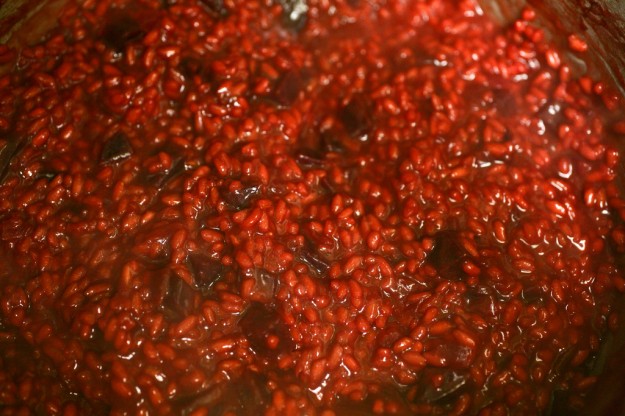
This particular risotto is no exception. The color alone should make you diving for your favorite wooden spoon and loosening up your arm in prepartion for the continuous stirring (or not – if you agree with Mark and Mario – which I am pretty sure you are safe to assume would work out splendidly).
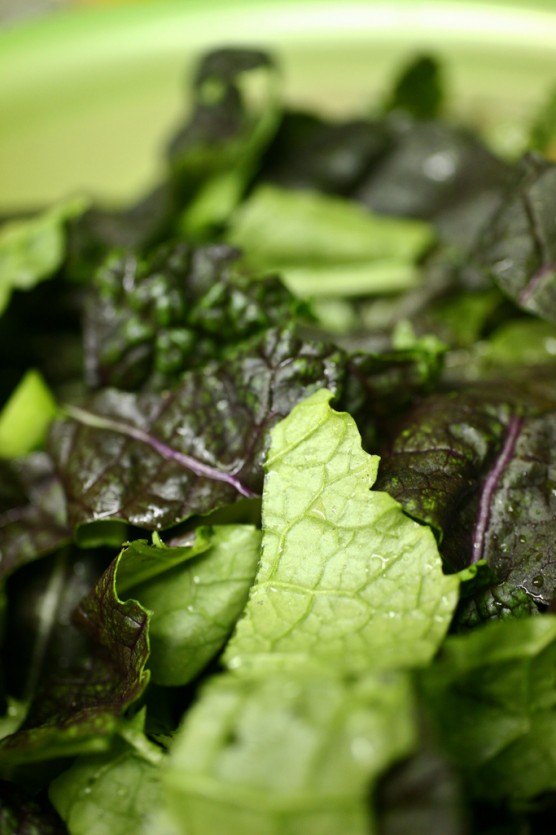
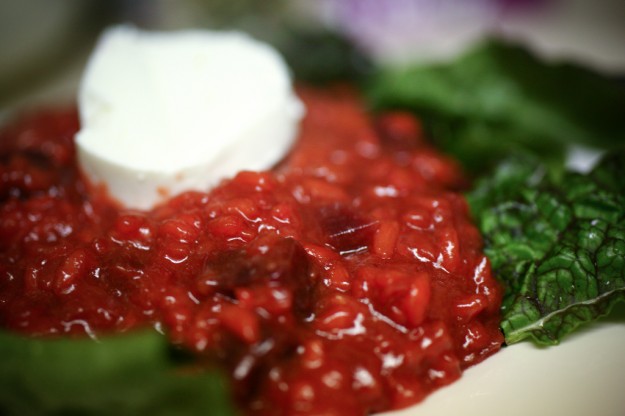
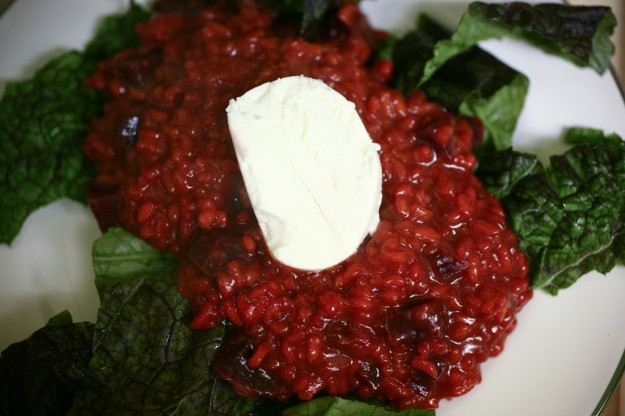
Red Beet Risotto with Mustard Greens and Goat Cheese
adapted from Bon Appétit | February 2007
Yield: Makes 6 first-course servings
Ingredients
1/4 cup (1/2 stick) butter
2 (2 1/2- to 3-inch-diameter) beets, peeled, cut into 1/4-inch cubes
1 1/2 cups chopped white onion
1 cup arborio rice or medium-grain white rice
3 cups low-salt chicken broth or vegetable broth
1 tablespoon balsamic vinegar
1 1/2 cups chopped mustard greens
1 (5 1/2-ounce) package chilled soft fresh goat cheese, sliced
Method
Melt butter in heavy large saucepan over medium heat. In a separate saucepan heat the broth to just under a simmer. Keep hot throughout the process. Add beets and onion to the large saucepan with the butter. Cook until onion is soft, about 8 minutes. Mix in rice. Add vinegar. Gradually add one cup of the hot broth. Reduce heat to medium-low. Keep at a simmer. When the rice has absorbed the broth add another cup. Continue to stir. Repeat this process until all three cups have been added. Simmer uncovered until rice and beets are just tender and risotto is creamy, stirring occasionally, about 15 minutes. Season with salt and pepper. Serve risotto on top of the greens. Finish with a generous portion of goat cheese.
Beet Risotto
Red Beet Risotto with Mustard Greens and Goat Cheese
adapted from Bon Appétit | February 2007
Yield: Makes 6 first-course servings
Ingredients
1/4 cup (1/2 stick) butter
2 (2 1/2- to 3-inch-diameter) beets, peeled, cut into 1/4-inch cubes
1 1/2 cups chopped white onion
1 cup arborio rice or medium-grain white rice
3 cups low-salt chicken broth or vegetable broth
1 tablespoon balsamic vinegar
1 1/2 cups chopped mustard greens
1 (5 1/2-ounce) package chilled soft fresh goat cheese, sliced
Method
Melt butter in heavy large saucepan over medium heat. In a separate saucepan heat the broth to just under a simmer. Keep hot throughout the process. Add beets and onion to the large saucepan with the butter. Cook until onion is soft, about 8 minutes. Mix in rice. Add vinegar. Gradually add one cup of the hot broth. Reduce heat to medium-low. Keep at a simmer. When the rice has absorbed the broth add another cup. Continue to stir. Repeat this process until all three cups have been added. Simmer uncovered until rice and beets are just tender and risotto is creamy, stirring occasionally, about 15 minutes. Season with salt and pepper. Serve risotto on top of the greens. Finish with a generous portion of goat cheese.


![]()
