Intro
I didn’t have children so that I could have a crew of sous chefs ready and waiting to assist me with the day’s menu or follow me around with a mop and broom cleaning up all my inevitable disasters. But as it turns out that is in fact one of the MANY perks of having a little brood.
Having just turned 3, Baron is actually becoming more of a help than a hindrance in the kitchen. Previously when agreeing to his assistance the piles of flour and sugar surrounding the bowl would be greater than those actually in the bowl. Fingers and tongues would graciously clean up the fallen sweet snow (actually this still happens but we’re working on it – hopefully this habit will be kicked before he goes to work in an actual kitchen).
I have also figured out that, while I’m not cut out to be a homeschooling mom I do believe I can teach my children everything they need to know through baking. Think about it – math, chemistry, biology – all covered. While studying the origins of certain baked goods and desserts you’ll learn history, geography and sociology. And then there are the underlying lessons learned such as patience, discipline & self-control (this comes through not eating ALL of the cookie dough before it has a chance to be baked) organization (which I am still working on) and sharing – in my opinion, the best part of cooking and baking.
With his apron on and fingers ready to help sample the sugar my sous chef was as excited as I was to assist with the day’s lesson: Danish Dough.
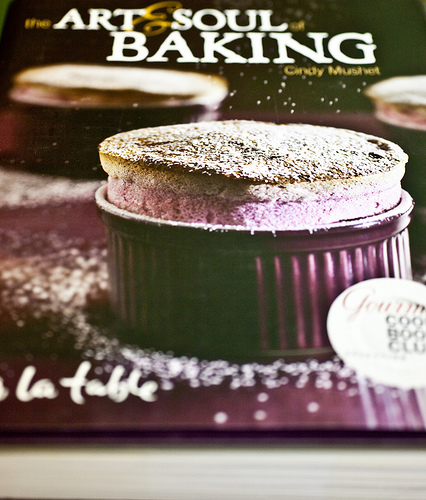
We used two books as our guide, Baking & Pastry and The Art & Soul of Baking. Get ready because this is quite a process but like most (if not, all) things that are surrounded by layers of butter – it is well worth the work and wait.
Danish Dough (Detrempe)
from The Art & Soul of Baking
1/2 cup warm whole milk (4 oz.)
1 tsp. + 2 tbl. sugar (1 oz.)
1 tbl. instant yeast
2 cold large eggs
3/4 cup cold whole milk (6 oz.)
3 1/2 cups all-purpose flour – unbleached (17 1/2 oz.)
1 tsp. salt
Butter Block (Beurrage)
3 sticks cold unsalted butter (12 oz.) cubed
1/4 cup all-purpose flour – unbleached (1 1/4 oz.)
Making the dough:
Combine the warm milk, 1 tsp. sugar, and yeast. Let sit 10 minutes or until bubbly. If bubbles do not appear you might want to think about getting some new yeast. 🙂
In another bowl (if you have one you can use a stand mixer at this point) whisk together the cold milk, eggs and remaining 2 tbl. of sugar. Combine the yeast mixture with the egg mixture. In a separate medium bowl whisk the flour and salt until well blended. Add the flour mixture to the egg mixture stir to combine or use the hook attachment if using a stand mixer. Mix on low for 1 1/2 – 2 minutes – until the liquid is absorbed and a rough dough has formed. Lightly knead 3-5 times on a flour dusted surface. Do not overwork the dough – through the rolling out process the dough will be tough and elastic if it is overworked at this point. Wrap the dough in plastic then refrigerate for 30-60 minutes. If you are planning on resting the dough for longer, which is perfectly acceptable, simply wrap the dough loosely so there is room for it to expand.
Making the butter block:
Toss the butter with the flour. In a clean bowl of a stand mixer (or a good old fashioned wooden spoon and bowl – in which case prepare for a work out) with a paddle attachment add the butter and mix on low until the butter and flour have formed a smooth mass. You don’t want to incorporated air at this point so keep the mixing slow. Form the butter on parchment or plastic wrap into a rough rectangle then cover and refrigerate.
Combining the Butter and Dough!!: This is exciting!
Lightly dust your work surface with flour. Roll the danish dough into a 15 by 12- inch rectangle with a short side parallel to the edge of your work surface. Pull or stretch the dough to form straight edges and sharp corners. Brush excess flour off of the dough – you don’t want the dough to feel too sticky but you also don’t want piles of flour on the surface. Visually divide the dough into 3 equal sections. Spread the cold but pliable butter over 2/3 of the dough (two of the three sections) leaving a 1/2 inch border around the edges of the buttered sections. Your fingers are your friends during this stage.
The letter fold – or three-fold
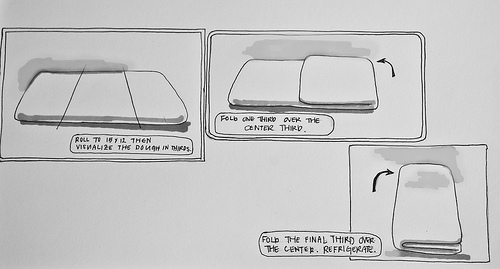
Gabe had all the cameras while we were making the dough so I drew pictures instead.
Fold the butter-less bottom third up over the center third of the dough. Then fold the top down over the center (like a letter!! – you know, the old fashioned kind we used to send in the mail). Pinch the seams along the bottom and sides of the dough. Use your rolling pin to help seal the sides. Nice work! You have now incorporated the butter with the dough and completed your first turn. If you butter feels a little warm and squishy, wrap and refrigerate the dough for an hour. If you are a speedy monkey and the dough is still cold, congratulations – you are now ready to graduate from the first turn and move on to the second.
Book Turn – or four-fold

Position the dough with the short side parallel to your work surface and the long fold on your left. Lightly dust the dough with flour and roll into a 20 by 12-inch rectangle. Fold the two short eges into the center of the dough leaving a 1/4 inch crevice between them. Square off the corners as best as you can. Now fold one side over the other – like you are closing a book. With a rolling pin gently roll over the dough to help seal the seams. Second turn is done! Wrap and refrigerate the dough for one hour – you and the dough both deserve a break.
Letter Fold, The II
Roll out the dough into a 20 by 12-inch rectangle again. Repeat the letter fold turn. Third turn is done and so is the Danish Dough!!
Cream Cheese Filling
adapted from The Art & Soul of Baking
8 oz. cream cheese (room temp.)
6 tbl. sugar (2 1/2 oz.)
1 large egg yolk
1 1/2 tbl. All purpose flour
1 tsp orange zest
1/2 tsp. salt
1 tsp. vanilla extract
Combine all the ingredients until smooth. A food processor is a great tool for this process. You can make the filling ahead and keep refrigerated for up to 5 days.
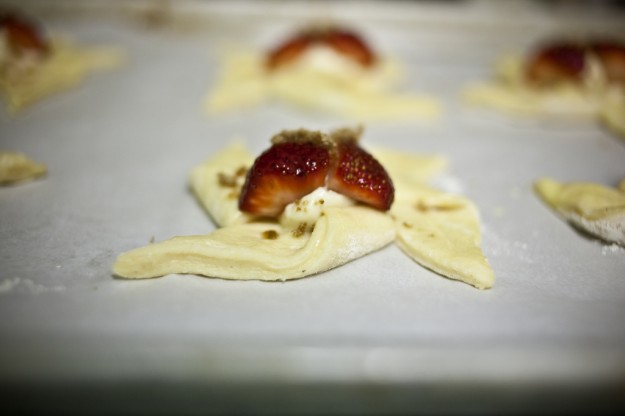
Roasted Strawberry Cream Cheese Danish
Baking
Divide the dough in half. This makes it easier to roll. Roll out the dough to 1/4 inch thickness. Cut the dough into any shape you want. Check out Joe Pastry for fantastic step-by-step images of creating many classic danish shapes.
Dollop 1 tbl. of cream cheese filling in the center (depending on which shape you choose) of each Danish and add a few pieces of quartered strawberries. Place completed danish on a baking sheet lined with parchment. Loosely cover with plastic wrap and let rise in a warm (but not to warm) spot until doubled in size. This should take about an hour. It should feel like a marshmallow to the touch.
Preheat the oven to 400*F and place the rack in the center. Freeze the Danish for 10 minutes (or the refrigerator for 15 minutes). With a pastry brush brush the danish with an egg wash (1 egg/1 yolk whisked together)
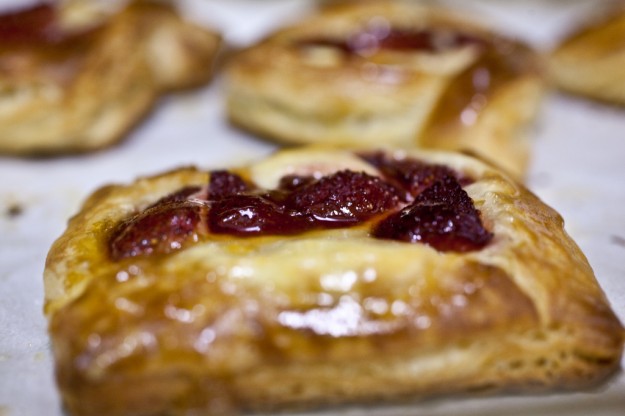
Bake one sheet at a time, rotating halfway through, for 14-16 minutes, until deep golden brown. Transfer to a cooling rack and immediately brush with apricot glaze (apricot jam gently warmed with a bit of water). Cool completely then dust with confectioner’s sugar just before serving.
Phew. Still with me? What are you waiting for – get baking!!!
I know I know. This is quite an undertaking but good things come to those who mix, knead, wait, add butter, roll, wait, turn, roll, wait, turn, cut, shape, fill, wait, bake, wait, glaze, wait, dust, EAT!!
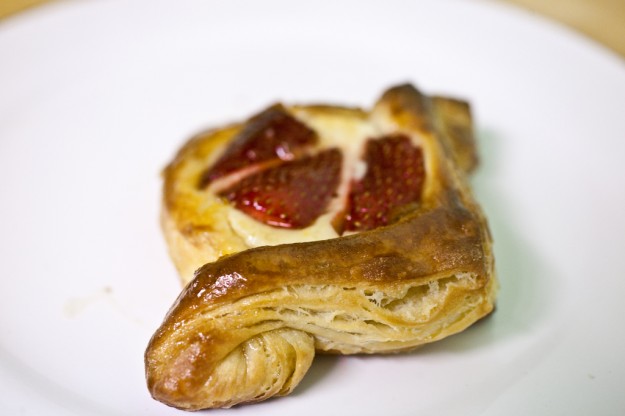
Seriously these pastries – while I know will improve the more proficient I get at the process – they tasted so heavenly. Buttery, tangy and sweet. The tri-fecta of all things delicious. If this sounds like too much work and you live in Seattle then hop in the car and go to Cafe Besalu – because THEY KNOW DANISH – and all things encased in butter.
If WE can do it so can you!!
PinkStripes overloads on Danish (if that’s possible)
ImAFoodBlog – has a great how-to
TheKneadforBread – Danish with Lime Curd and Mascarpone?! Yes please!


OHHHH you make my mouth water! Why oh why are you so far away???
Amazing! I’m new to your blog, but I had to comment: what a beautiful post. First, the final product looks divine. Then the illustrations are great: did you do them? And what a great inspiration that you take on this challenging project with your three-year old! I have three kids and usually have no patience with them in the kitchen. Must try again soon.
Gorgeous! My husband recently asked me to make him a raspberry danish – I do believe yours will be recipe I try. Thanks!
What lovely illustrations! They show a lot of investment and care.
These look wonderful and I absolutely love your watercolor and drawings. What a unique and delightful addition to the post. The thought of making a butter layer dough has always made me very nervous, but I’m baking a lot more this year and might have the guts to try it soon!
Hey! You managed to link to two of my very favorite food blogs in one post. Imafoodblog and the Great Joe Pastry 🙂
Yours looks absolutely awesome!
love the illustrations! 🙂
These look to die for! Making them very soon! thank you for all the great illustrations. By the way, looking through your photography, it is INCREDIBLE. No, beyond incredible! Love it!
I got that book for Christmas, now I’ve got to make these soon! Thanks!!
Jess : )
Hi Ashley
Can I freeze the dough and make them later?
thanks
Yes, for at least 1 month.